In the world of coffee lovers, roasting green coffee beans at home has gained significant momentum. With a staggering 66% of Americans drinking coffee daily, the quest for the perfect cup has led many to take the reins into their own hands, roasting green coffee beans in their kitchens. Yet, the heart of achieving that coveted barista-level cup at home lies in storing green coffee beans correctly. Even the finest beans can lose their magic if improperly stored, leading to a flat, uninspiring cup. This guide highlights the crucial dos and don'ts of green coffee bean storage, backed by expert insights to help you preserve the essence of your beans, ensuring every roast is as vibrant as its first.
Choosing the Right Green Coffee Bean Storage Container
Selecting the ideal storage solution for green coffee beans is more than a matter of convenience; it’s about preserving the integrity and potential of every bean until it’s time to roast. Here are the top-notch options for stashing away your prized green coffee beans, each tailored to lock in that freshness and set the stage for your next roasting adventure.
1) Airtight Containers
The cornerstone of effective coffee storage is airtight containers, which offer a robust barrier against the elements. These containers are engineered to lock out air, ensuring the beans are shielded from oxidative processes that can dull their flavours and aromas. Creating a stable environment where the beans' natural qualities are preserved is crucial for maintaining freshness.

2) Mason Jars
A blend of traditional charm and practicality, Mason jars have found a niche in coffee storage. While their transparency requires careful placement away from light, their airtight seals provide excellent defense against air and moisture. The visual appeal of beans nestled in glass jars adds an aesthetic touch to your kitchen, transforming storage into a display of your roasting journey.

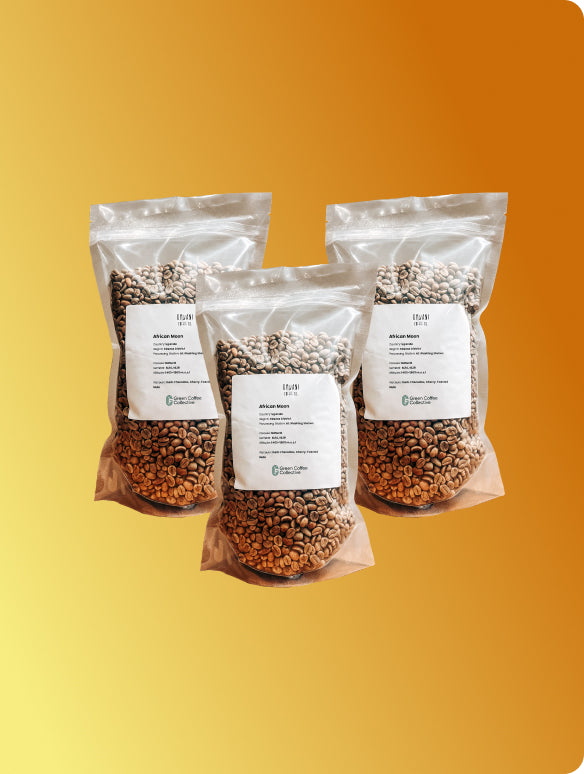
3) Vacuum-Sealed Bags
For those looking to go the extra mile in bean preservation, vacuum-sealed bags present a formidable option. By extracting air from the equation, these bags minimize the beans' exposure to oxygen, drastically slowing down the degradation process. This method speaks to the meticulous roaster, keen on maintaining the beans’ freshness over extended periods.

Key Considerations When Selecting a Storage Container
When choosing the best storage for your green coffee beans, it’s essential to consider factors that impact their quality. Let’s explore these crucial points to ensure each bean is stored correctly, ready to reveal its best flavours when you roast them.
Factor 1: Light Protection
Light, especially direct sunlight, can degrade green coffee beans, leading to the loss of delicate compounds. Opt for containers with UV protection or use opaque containers. Storing beans in a dark place, even when using transparent containers like Mason jars, can mitigate the risk of light exposure.
Factor 2: Airtightness
The importance of an airtight seal cannot be overstated. Oxygen is one of the primary culprits in the staling of coffee beans. Containers with high-quality, airtight seals protect the beans from ambient air, preserving their inherent flavours and extending their shelf life, especially in humid environments.
Factor 3: Size and Capacity
The size of the storage container should match your consumption patterns. Storing beans in a container that’s too large can introduce unnecessary air, even if it’s airtight, potentially compromising the beans over time. Conversely, a container that’s too small might cramp the beans, affecting their natural state. Consider your roasting frequency and volume to choose a size that minimizes air space while providing enough room for the beans you typically handle.
Green Coffee Guardians: How to Store Your Beans for the Long Term
Keeping your green coffee beans fresh for a long time requires careful planning. You must protect them from temperature, light, and air to maintain their freshness and flavour. Let’s look at the best ways to store your beans so they stay as fresh and full of flavour as when they were first picked.
Steps for Storing Green Coffee Beans for Extended Periods
Step 1: Controlling Temperature and Humidity
The stability of your beans begins with the environment. The ideal temperature range is 20-25°C (68-77°F), with humidity levels meticulously maintained around 60%. This equilibrium prevents the beans from becoming too dry or moist, which can compromise their flavour and lead to spoilage.
Step 2: Avoiding Exposure to Light
Just as a fine wine needs the cover of darkness to preserve its essence, so do your green coffee beans. Light, especially UV, can hasten degradation, stripping away the beans' delicate flavours. Opt for opaque, light-proof containers or store your beans in a dark pantry or cupboard to prevent light exposure.
Step 3: Minimising Air Contact
Oxygen is the unseen foe in the room, eagerly reacting with the beans and diminishing their freshness. Vacuum-sealed bags offer a practical solution, creating an almost airless environment that slows oxidation.
Tips for Maintaining Long-term Storage Freshness
To ensure your green coffee beans maintain their freshness for as long as possible, consider these practical tips:
- Regular Bean Check-ups: Inspect your beans periodically for any signs of spoilage, such as mold or pests. Early detection prevents the spread and safeguards your supply.
- Rotate Your Stock: Implement a "first in, first out" policy. This means using the oldest beans first to keep the stock moving and prevent any beans from sitting too long and losing quality.
- Label Clearly: Use a clear labelling system on your containers, including details like the date of storage and the bean's origin. This practice helps you track freshness and manage inventory efficiently.
Spotting Trouble: Identifying Signs of Bad Green Coffee Beans
When you're gearing up to roast, the last thing you want is to discover that your green coffee beans aren’t up to snuff. Here’s a closer look at the visual and olfactory signs that your beans might be headed for trouble and why catching these cues early can save your batch from a brewing disaster.
Visual Cues Indicating Spoilage
- Mold or Fungus Growth: Fuzzy or powdery splotches on your beans indicate mold, a clear sign that moisture has been meddling where it shouldn’t. Mold doesn’t just mar the beans’ appearance; it can degrade their flavour and pose health risks.
- Discolouration or Spotting: Green coffee beans should have a vibrant, consistent colour. If you see beans that have turned yellow-brown or are sporting odd spots, it’s a red flag. These changes can result from less-than-ideal drying methods, excessive fermentation, or poor storage conditions.
- Pests or Insect Infestation: Tiny holes or marks on your beans might indicate pests like the coffee borer beetle. Regular inspections and proper storage can help keep these pests at bay.
Evaluating Smell and Aroma for Freshness
Beyond visual checks, the aroma of your beans can reveal much about their condition:
- Rancid or Musty Odour: If your beans smell musty or rancid, it’s likely a sign of mould or decay. Such odours often arise from improper storage conditions, where excess moisture and poor ventilation create a breeding ground for spoilage.
- Lack of Distinct Coffee Fragrance: Fresh green coffee beans should carry a hint of freshness, reminiscent of grass or earth. If your beans lack this fragrance or smell unusually bland, they might have lost their vitality, pointing to staleness or exposure to adverse conditions.
Cupping Technique: Unveiling the Bean’s True Essence
Cupping is not just about tasting coffee; it’s a method to discover the detailed flavours, aromas, and any issues in each coffee bean. This technique is essential for checking the quality of beans before committing to a full roast. Here’s a quick guide:
- Preparation: Start with a light roast to preserve the beans' inherent characteristics. Grinding the beans to a medium consistency ensures an even extraction during the cupping process.
- Brewing: Pour hot water over the coffee grounds and allow the coffee to steep. This method highlights the beans' flavour notes, acidity, body, and any off-tastes that might not be apparent in the raw product.
- Tasting: Slurping the coffee from a spoon aerates it, spreading it across your palate to fully appreciate the nuances. This step is crucial for detecting undesirable flavours, such as sourness or bitterness, which can indicate underlying issues with the beans.
- Assessment: Each aspect of the coffee’s profile is carefully evaluated. Beans that produce a balanced, complex cup are deemed suitable for use, while those that yield off-flavours or lack depth may need to be reconsidered.
Closing Notes
In our journey through storing green coffee beans, we’ve uncovered the secrets to preserving their freshness and flavour. Each step, from choosing the right container to assessing bean quality, is crucial in ensuring that your beans are ready to deliver a perfect cup. Whether you're a seasoned roaster or new to the craft, success lies in the details. With care and passion, you can transform humble beans into extraordinary coffee. Here’s to the art of home roasting and its endless possibilities!